With the motto “Loving the Simple Life, Getting Back to Basics”, Shannon Cole has brought us amazing recipes like Broccoli Bacon Salad, BBQ Chicken Nacho Salad, Lemon Thyme Ice Pops, Herbal Infusions and Lavender Water, Giambotta, Verde Sangria and Blue Cheese Burger Bites.
What more could you want?
Shannon’s Country Girl in the Village blog at countrygirlinthevillage.com was an amazing resource for women on recipes as well as herbal gardening, homesteading and more. We’re very excited to announce that we’ve acquired those assets and are merging them here on Independent Femme as of today!
 Shannon’s bio on the blog says: “With my Husband, we raise our two sons and a nephew, three dogs, a cat, four chickens and a large garden on my just under an acre lot in a small village in Southeast Michigan.
“I am passionate about real food, and eating as local as we can without giving up olive oil, coffee, you know the necessities. Herb gardens and backyard chickens, reading, writing, photography are my other passions.
“I believe that things will work out eventually, the glass is not only half full but it is refillable.”
Below we’re posting some of the most popular blog posts and healthy recipes that anyone can create for their family in the comfort of their own kitchen – all of the original and from Shannon.
Vanilla Beans and Coffee Scrubs
Coffee Scrubs are easy to make at home. Great way to exfoliate and moisturize your skin.
Vanilla beans have to be one of my favorite things to work with. They smell amazing. There are so may health benefits and skin care benefits that are associated with them. I was working on a post for Herbal Living and knew I had to share how I combine vanilla with coffee to make a delicious scrub.
Coffee can chalk up one more point of awesome for its amazing exfoliating quality. I have been toting the amazing wonders of coffee scrubs for years. What sets each apart is the ingredients I use with the coffee. I shared one that utilized some invigorating essential oils like peppermint as well as the one on Herbal Living that uses vanilla beans. All are awesome things to add to your skin care regiment for smoother, softer skin.
You will have to check them out. You can also find some great pins on my pinterest board that is dedicated to all things herbal, essential oils, or as my kids call hippy crunchy mom stuff. What do they know? Teenage boys… Hummf
Also read: The Best Exfoliating Body Wash Scrub For Women
Herbal Infusions, Lavender Water, Exciting News… Oh My
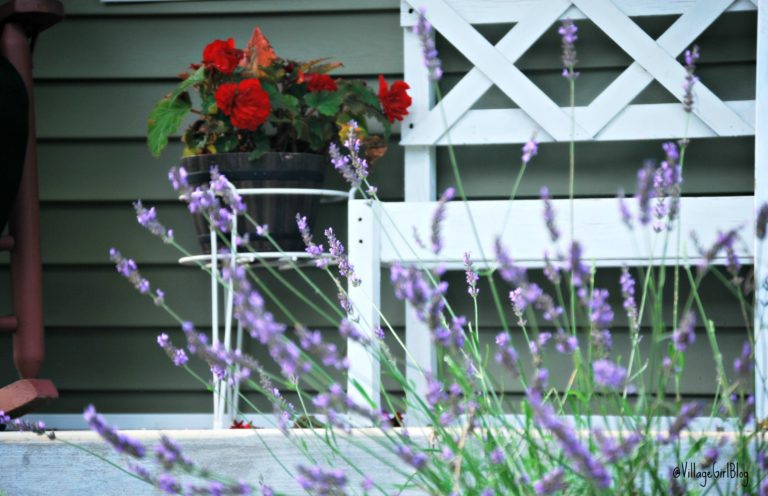
Good Morning Friends! I have some exciting news. I will be sharing posts over at Herbal Living. An online collection of all things herbal from Mother Earth Living. Yay!
You know me, my poor kids are never sure what is mixing in my Kitchen Aid Mixer. It could be cookie dough or lotion. They definitely have to look first before tasting a beater attachment.
What got me on this herbal journey you might be wondering… Backyard chicken keeping is what really lead me down the herbal path. There are no chicken doctors in my area. To keep a flock of chickens, you get creative. It has been an awesome adventure that lead me down roads I never dreamed I would go. I have met amazing people along the way.
Also read: Classy Lady Quotes To Inspire You
My first post at Herbal Living is one about making Lavender Water. This is a super simple project that is a great way to get your feet wet (maybe pun intended) in the herbal project world. It uses fresh cut lavender to make a soothing spray that can be used to freshen linens as well as soothe a savage sunburn. Check it out.
Spring Time in the Apple Orchard
 While Autumn is my very favorite season, Spring time holds a special place. It is a promise of renewal and rebirth. I don’t know about you, but for me it is the reward for bleak late winter winds and cold.
There is an apple orchard not far from my house. We go there often in the summer and fall. There are berries and apples,honey, wine, donuts and cider, all the things you think of when you think Apple Orchard. I could live on the apple cider slushies.
However, I have never really slowed down to truly appreciate the beauty of an apple orchard in the spring. This is about taking time not just to smell the roses, but to stop and appreciate the apple blossom.
Beehives are set out. You can see the jars of sugar water attached to help supplement the bees. The trees are in full bloom and absolutely beautiful. Soon, the pollinators that are housed ever so purposefully on the edge of the rows of trees will be out sprinkling their magic.
Also read: How to Forgive Yourself For Cheating
Even on a dreary day like today, the sweet smell of blooms permeated the air. They gave us a promise, one that these delicate flowers would soon bear fruit. The branches of the magnificently twisted trees would soon enough be laden with heavy apples. The wagons will be there for hay rides.
Laughter will be added to the sounds in the air as families pick apples and pumpkins, as they feed the goats and chickens, as they appreciate nature.
Even on this quiet Saturday, with the noise of a few chickens and the occasional snicker of a pony, the rustle of the apple blossoms carried out and gave us mother nature’s promise. That even after a long and cold dormant winter, the blossoms of the Spring will give way to the fruits of the summer and fall. Life goes on in its beautiful circle.
Herb Gardening
This Mothers Day weekend has been beautiful weather. Some years, I spend it planting in my garden. This year, it still feels too cool for most plantings, but I am just dying to play in the dirt. Who doesn’t love a sun ripened tomato? Or sweet watermelon fresh from the vine? My favorite part of my gardening though are the herbs.
My food philosophy is fresh is best and always add an herb to every dish. Some days that herb is simply parsley other days there can be a lots of different herbs involved. Fresh herbs add so much flavor to food and really bump up your home cooking to another level. Herbs in your ice water or teas are great for flavor.
Also read: How to Remove the Aztec Healing Mask
Herbs are also great in skin care. I dry herbs to add to bath salts, infuse them in oils for making salves and for making other skin care items. Yes, rosemary in your Epsom salt bath… Or thyme and lavender are a great combination too. Grow and herb garden. Easy to do and so many benefits to your yard, your cooking and your skin care routines.
What to plant…
For many just starting out with an herb garden start simple. Parsley can go in any dish you plan to make. Thyme is lemony and can brighten most dishes. Lavender is always handy to have around. I am a big fan of cilantro, but not everyone is. These can all be grown in small container gardens or incorporated throughout your yard. I plant lavender everywhere.
In my herb garden, I plant a variety or perennials and annuals. My annuals I start indoors and then transplant them into my herb garden.
Perennial herbs to grow, ones that will live longer than a couple growing seasons are:
Chives
Fennel
Lavender
Lemon Balm – One of my favorites
Mint
Oregano
Rosemary
Sage
Tarragon – in some warmer climates. Not so much for me in my chillier zone 6a
Annuals are the fleeting wonder that really only grow for a season or many two. You can usually grow them indoors on a window sill or other bright and sunny place too.
Basil
Cilantro
Dill
Marjoram
Parsley
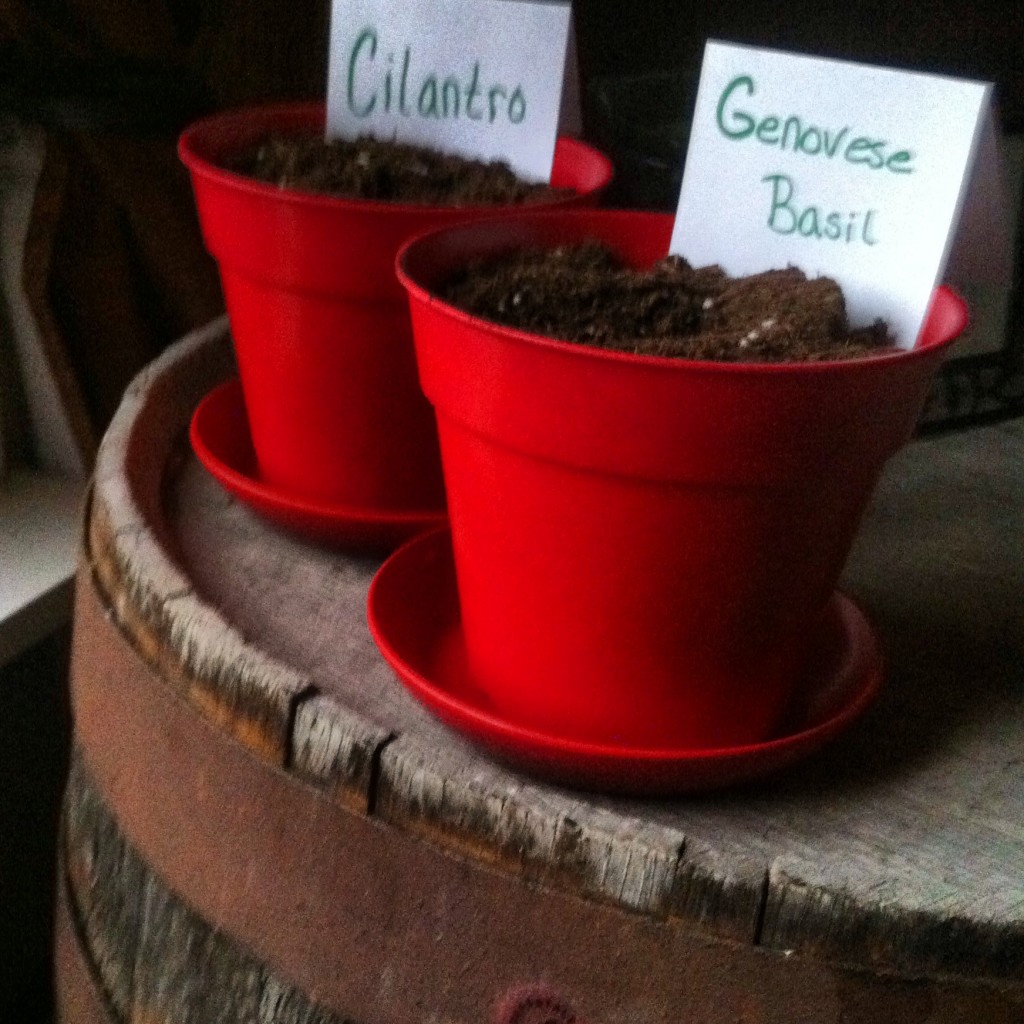
Grow an herb garden. Easy to do and so many benefits to your yard, your cooking and your skin care routines.
Where to plant your herbs. Your herbs do like sun. Most are sun loving and will require full sun. Some, like mint and chives will tolerate partial shade in the afternoon and still grow well. I like to plant my herbs close to the backdoor of my house for easy access when cooking. I simple step off my back porch and pluck a few leaves or stems and harvest all summer long. I also like to plant lavender under bedroom windows. On a warm sunny day, the sent will fill your rooms. Herbs can also be planted in your vegetable garden too.
Harvesting. I will harvest leaves and stems daily in my cooking. Only taking what I need each day. At the end of the growing season, I harvest the annuals and dry their leaves then store in mason jars to use throughout the winter. The perennials I like to harvest some leaves and stems, but leaving enough so the plant survives, and dry these as well for storage.
So get out there, maybe not this weekend, but sometime this summer, and plant yourself some herbs. These tiny aromatics are all the way around awesome and beneficial to your yard and you.
Dandelion Oil Salve
Save the Dandelion… It is all over Facebook as a warning to preserve the dandelions for bees. One post I saw stated that dandelion’s “are the very first food source for bees after a long winter”. That may very well be true, but save some of the dandelions for yourself too. These underutilized plants have so many qualities!
Also read: What Is Dressy Casual For Men?
The Greens, the leaves, of the plant are incredibly nutritious. Use them in a salad for yourself or feed them to your chickens. They freeze well and I keep some on hand for winter coop boredom busters and added chicken nutrition. The roots to the plant and the dried heads of the flowers can be made into herbal teas.
Teas, food, all really great things, but my most favorite way to use dandelions is to dry the heads and infuse olive oil with the dried flowers. The oil can be used alone, but I like to turn it into a salve that I use on my hands, feet, forehead, aching muscles… as well as on my chickens’ combs.
Infuse dried Dandelion Flowers in Olive Oil to make homemade skin care products!
Recently, I shared my recipe on Community Chickens for how I make Dandelion Salve. It is a simple process and oh so worth it…in my humble opinion.
Dandelion Infused OilPrint recipe
Dandelion Infused Oil
Ingredients
1 cup Dried Dandelion Flowers (just the dried heads, more greens)
1 Pint Sized Mason Jar
1 pint Olive Oil (You will not use quite the full pint amount as you’re are covering the dandelion flowers.)
Note
You can also speed up the infusing process by placing your jar in a slowcooker. In your slowercooker, place a washcloth on the bottom, then your jar on top of that. Add water until the water covers about half way up the jar. Turn the setting to warm. Let infuse for 6-8 hours.
Directions
Step 1
Add dried flowers to the glass jar.
Step 2
Pour the olive oil over the flowers. Leaving 1 inch of headspace in the jar.
Step 3
Use a butter knife to stir and remove air bubbles.
Step 4
Cap your jar and store in a cool dark place out of direct sunlight.
Step 5
Shake jar once a day for 4-6 weeks.
Check out my Community Chicken’s post and snag the recipe on how to make Dandelion Oil Salve. It is also on Pinterest. Pin it for later. Love it!
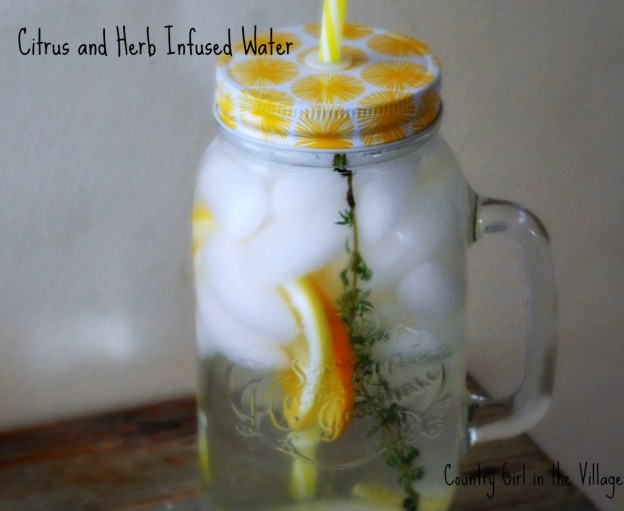
Citrus and Herb Infused Water
 I am just gearing for Spring to really take over. My soul is craving sunshine and warm breezes. I want to put up my clothes line and fill my sheets with the smell of wildflowers and mowed grass. The hint of baseball season has my family buzzing about. Cleats are dusted off, mitts oiled and sunflower seeds bought in bulk.
Our chickens are starting to lay more regularly after their winter break. Life is being awakened and renewed all around us. Michigan winters may be long and cold, but they sure do make us appreciate Spring. Spring Fever? Yes, I you could say that I have caught a case.
One way to add some sunshine to your life, even when your garden is dormant, is infused waters. I do not drink much pop (soda for non-Michiganders), but now and then I want some flavor in my life. I began infusing waters with more than a slice of lemon last year.
A gift from my aunt got my creative juices flowing and I have been experimenting ever since. One of my sunny day favorites is a citrus and herb infused water. I make up a large 3 Quart pitcher that my family will drink up in a couple of days.
Citrus and Herb Infused Water Recipe
Ingredients
1 Lemon (Sliced into thin rounds, peel on)
1 Orange (Sliced into thin rounds, peel on)
1 Lime (Sliced into thin rounds, peel on)
8 sprigs Thyme (left whole)
1 tablespoon Honey
3 quarts Warm Water
Note
Using the warm water when making this drink helps the citrus fruit and herbs release their oils. The warm water also helps the honey to mix well. If you notice the flavor is too intense, add more water until you are satisfied. Refrigerate and enjoy over ice.
Directions
Step 1
Wash all your fruit and Thyme.
Step 2
Slice your fruits into thin round slices leaving the peel on.
Step 3
Fill your pitcher with lukewarm water.
Step 4
Add the honey, fruits and herbs. Shake Well.
Step 5
For Best Flavor, let sit for an hour or longer. Serve over ice.
Citrus and Herb Infused WaterInfusing water is so easy to make. Flavorful, healthy and far better for you than those plastic bottles from the grocery store. They are even better once your garden or local farmers market is loaded with seasonal and fresh fruits, veggies and herbs.
Coffee Scrub Recipe
Our first snow fall of the season and Mother Nature came at us with over a foot of snow. It was beautiful. There are few things as peaceful as the quiet sound of falling snow. One of the many reasons I love living in Michigan is the changing of the seasons. However, this time of year, my skin is taking a beating from the dry forced heat of the furnace and the many hand washings that go along with working in an elementary school. One of the ways that I combat dry skin is by making my own exfoliating, super moisturizing, coffee scrub.
Also read: The Essence of Being a Woman
Winter is very drying to my skin. I love to make a homemade moisturizing coffee scrub.
In this scrub, I use organic coffee, organic cold pressed pumpkin seed oil and raw honey. Pumpkin seed oil is rich in vitamin E as well as zinc which are great for your skin. I also use essential oils to help enhance the scrub. I chose peppermint oil as I find it to be invigorating. I also use grapefruit oil in the scrub because I find it helps with acne and combating oily skin.
Homemade Coffee Scrub Recipe.
Ingredients
1 cup Ground Coffee (I use finely ground, but you can choose how coarse based on your own skin type)
2/3 cups Virgin Pumpkin Seed Oil
1 tablespoon Raw Honey
3 drops Peppermint Essential Oil
5 drops Grapefruit Essential Oil
Note
This Scrub is very moisturizing. Apply to skin using circular motions. Then rinse. I find it works best to rinse with warm water. When using essential oils, be sure to try a little bit as a test. If you experience any adverse reaction, discontinue use. This is not to be ingested.
Directions
Step 1
Combine your coffee, honey and pumpkin seed oil. Stir into an almost pudding type texture.
Step 2
Add your essential oils, 1 drop at a time. The peppermint is invigorating and grapefruit is great for your skin, however a little goes a long way. There will be a coffee aroma that blends in with the essential oils and should be pleasant.
If you live in Michigan or other snowy climates, you will go stir crazy before long if you don’t venture out into the weather. I have my chickens to keep me going outside each day. Roscoe, our 1 year old little bundle of fur joy also likes to play in the snow. Little is maybe an exaggeration as you can see I walk him on a horse lead rope, but after hiking about in the snow, I need to replace the moisture that the wind wicks away. This coffee scrub is one of my favorite ways to do that. I do not feel like I need lotion after using it. The scent of coffee mixed with the light peppermint and grapefruit is refreshing.
Moisture Rich Coffee Scrub
I hope you enjoy.
The Great Parenting Experiment
This past week has marked the end of summer vacation for me. I was back at school, copying papers, decorating bulletin boards, connecting with an awesome team of people who are excited for the 2015-2016 school year. I am lucky and work with people who inspire me everyday.
They inspire me to make a difference in the lives of children. It is an enormous task. One that weighs on each and every member of our school. I work in an elementary school, so the students I get to interact with daily are still quite young. It is a polar opposite from my home and volunteer life.
The Great Parenting ExperimentAt home, this year, we have a Senior and Junior in High School and a boy entering his 8th grade, final year, of Middle School. The problems are much more different from when the kids were younger. So much more feels at stake. The two oldest got their first cars yesterday. The excitement they felt was so visible on their faces it was heartwarming. That is, until I realized that they can now drive off, without me, almost whenever they want.
What an anxiety induced moment for a parent. All of a sudden, they really are not little boys, they are young men. Yes, I know they worked all summer. Yes, I know they are almost to the end of their high school careers. Yes, I know that they are far taller than me and so none of this should be a revelation, but it still was and is.
How do you parent almost adult young men? Each one’s personality is so different. There are all the sympathetic glances in the world to parents going through sleep withdrawn nights with newborns or the terrible twos, but the camaraderie of parenthood seems to end there. No one really likes to talk about the struggles of raising teens. Not my child mentality, wool pulled over eyes, no one wanting to admit to the next that these things happen.
Sex, drugs, drinking, driving, grades, oh the list can go on and on. Each one of these carries consequences far deeper than that temper tantrum that may or may not have happened in the toy aisle of Target. The Target tantrum will not get them killed or jailed, at least not by the government. Go ahead and time-out those babies to your heart’s extent.
The “Mommy Wars” hurts me to even say that last bit out loud. All moms are in the great parenting experiment, dads too. That is what it is, parenting is just a big gamble, an experiment without a control group. In fact, save some heart ache and do not make comparisons. What you do, may or may not pay off in the end.
You really can’t fast forward to see where the struggle takes you and your children. I can tell you from my experience, nothing, ever works out the way you plan. I mean, let’s be real, how can you even plan when your children are humans too? We are not God nor are we puppeteers. No amount of string pulling is going to make my children walk the path I want them to take.
They will hopefully get there their own way, with some of my guidance sinking in and influencing their steps. Life is a journey that we all must make, and it is one that no one else can travel for us, only with us.
Sure, we give our children tools. We try to teach them life lessons that we feel are important. We hope to reason with their teenage minds. Will they remember that when they are off in the world without you there? A parent hopes so. Will they remember to mind their manners with other people? To be kind. One hopes so. Will they realize how much hurt they can inflict on a parent when they are trying to gain Independence?
That pulling away can be torture. Can we hope for a little empathy? Do teenagers even feel empathy? In my experience, they do, just not right away or always in public. Sometimes, they need a minute to process that emotion. Don’t we all need a minute to process emotions sometimes?
A few minutes ago, I waved good bye to two of my boys as they left our home, our driveway, and went out to breakfast together. I hope they remember all these things. I hope they continue to make time for each other in this busy world. I hope that they look back at me in the rear view mirror and they know that in this great parenting experiment, I am doing my best.
Spinach Berry Salad Recipe
The month of February is Heart Health month. People are wearing red and spreading awareness for heart disease. Eating healthy meals is one of the ways to help combat this disease. February is also the month that I am officially over snow and being cooped up indoors eating casseroles. I want to eat fresh foods, even more than on January 1st when so many of us make a resolution to do so.
Fresh foods are not growing in my yard just yet, but I have begun to plan my garden that will take over my backyard this Spring and Summer. Go away snow, I have things to do.
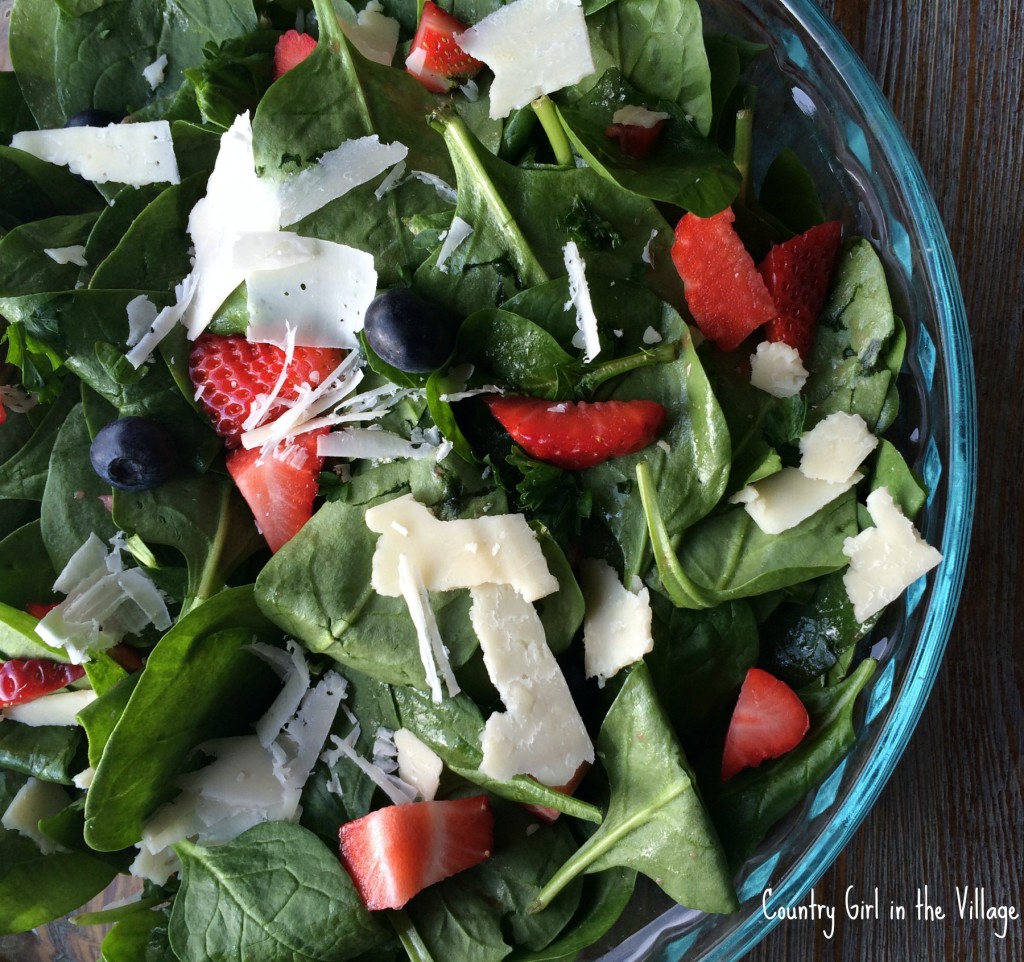
Fresh, Fresh, Fresh. Spinach Berry Salad with a Strawberry Vinaigrette.
When my body is craving fresh, whole, heart healthy foods, I turn try to eat colorful. Colorful? Fruits, Veggies, the more colors the better. Today, I am sharing a colorful, tasty, loaded with great things for your body, spinach and berry salad as well as a homemade vinaigrette.
This salad features spinach, berries and walnuts. Walnuts that are loaded with healthy fats, fiber and antioxidants. They are also a great way to add protein to a salad. I top this salad with shaved Parmesan Cheese. Cheese is not necessarily heart healthy, however a couple small shavings can add a ton of flavor to a dish without adding extra salt and unhealthy fats.
A little goes a long way with a good cheese. There is also a healthy handful of chopped parsley in the salad. No salad should be without a fresh herb. These herbs are another way to add in great flavor without salt or fat.
Spinach Berry Salad Recipe
Ingredients
Baby Spinach (I used 1 5oz bag)
handful Fresh Parsley (chopped)
1/2lb Fresh Strawberries (Halved)
1 pint Fresh Blueberries (Whole)
1/4 cup Walnuts (Chopped)
Parmesan Cheese (Shaved on top of salad to finish.)
Strawberry Vinaigrette (To dress salad)
Directions
Step 1
Combine ingredients into a salad bowl.
Step 2
Toss with fresh Strawberry Vinaigrette
Step 3
To serve, top with shaved Parmesan Cheese
This salad is wonderful topped with my homemade vinaigrette. It has heart healthy berries, extra virgin olive oil, sweetened with honey and just a wee pinch of salt.
Strawberry Vinaigrette Recipe
Ingredients
1/2lb Fresh Strawberries
1 tablespoon Orange Juice
1/2 teaspoon Honey
2 tablespoons Extra Virgin Olive Oil
1 tablespoon White Wine Vinegar
1 pinch Salt
1 pinch Cracked Black Pepper
Directions
Step 1
Combine all ingredients into a blender and blend until smooth.
Fresh, Fresh, Fresh, Spinach Berry Salad with homemade Vinaigrette. Heart Healthy for #SundaySupper
Adding in heart healthy foods does not have to mean bland and boring any more. The Sunday Supper crew, has got you covered this week. Thank you Lori of Foxes Loves Lemons and Ethel of eating in instead for hosting such an inspiring event. Some good food and exercise and we are all on our way to strengthening our hearts.
Vernors Ginger Ale Cake Recipe

There are a few things that scream Michigan to me. Cherries fresh from the tree in July, Whitefish from the shores of Lake Superior, Apples and all things apple crisp in the Fall, and of course Vernors Ginger Ale all year round.
Vernors has been hailed as a cure all for upset tummies and all around spirit lifter on bad days. It is poured over ice cream and enjoyed throughout the hot Michigan Summer. A Detroit original since the 1880s after all. So when the Sunday Supper Crew was tasked with sharing recipes that represented their Hometowns, I had to come up with something Vernors.
This cake is flavored with not only Vernors Ginger Ale, but also vanilla extract to really mimic the cream soda ginger ale greatness of Vernors. The glaze contains both Vernors and ground ginger to add that gingery kick. In the end, you have a pretty, buttery cake with hints of ginger that is sweetened up with a thin ginger glaze.
Vernors Cake recipe
Ingredients
2/3 cups Butter
1 3/4 cup Sugar
3 Eggs
1 1/2 teaspoon Vanilla Extract
3 cups Cake Flour
2 1/2 teaspoons Baking Powder
1 teaspoon Salt
1 cup Vernors (Ginger ale)
Directions
Step 1
Cream the butter and sugar together
Step 2
Add in the eggs and vanilla extract
Step 3
Add in the dry ingredients gradually, while mixing
Step 4
add in your Vernors. Beat together for 1 minute.
Step 5
Pour into a bundt pan or mini bundt pans
Step 6
Bake in a 350F preheated over for 24 to 28 minutes
Vernors Glaze for Cakes Recipe
Ingredients
1 1/2 cup Powder Sugar
1/4 teaspoon Ground Ginger
1/4 teaspoon Salt
1/2 cup Vernors (Ginger ale)
Directions
Step 1
whisk together the dry ingredients in a mixing bowl
Step 2
slowly add in your Vernors while whisking. This will fizz up.
Step 3
Whisk until smooth and use as a glaze on cakes, muffins, or doughnuts.
Of course, you can use what ever ginger ale you like in this recipe, but it would not be a hometown or Michigan celebration without Michigan made Vernors. I mean, is there really other ginger ales out there?
This week’s event is being hosted by Coleen of The Redhead Baker. Take a look at all of the hometown recipes that are being shared. This is like taking a trip without ever leaving your home. Culinary travels are kinda the best after all.
Homemade Kahlua Coffee Liqueur Recipe
If you are like me, the Holidays are a time of family and tradition. Thanksgiving kicks off the season and now we are in a mad dash to find the best gifts, bake the best cookies and treats, all to make the Holidays special for the people we love.
Gift giving is one of my favorite parts of the Holiday. I thoroughly enjoy the hunt for the perfect gift. I am terrible at keeping the secrets of my finds. I have been known to give gifts way too early… A way to combat that is when I make gifts for my loved ones. It gives me less time to be strong and not give the gifts early.
I’m a sucker, I know. Scarves, bath salts, homemade lotions, I try my hand in all of it. The time and thought that goes into these gifts always seems appreciated.
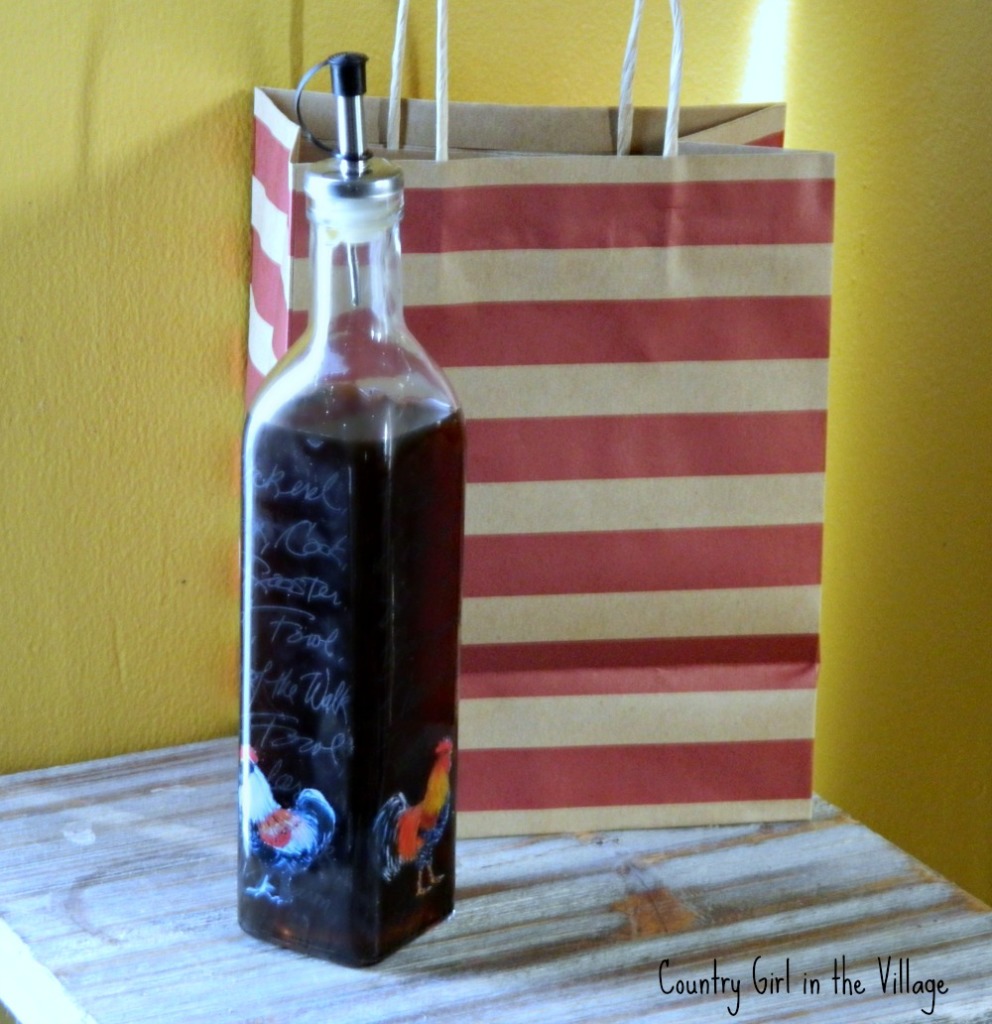
A gift from my kitchen that always goes over well is homemade kahlua. It is a coffee and vanilla infused syrup combined with rum. When making homemade liqueurs or cooking with spirits in general, it is important to remember to use good quality ingredients. Just like in baking, the ingredients you use will help with the overall flavor and appearance of your gift.
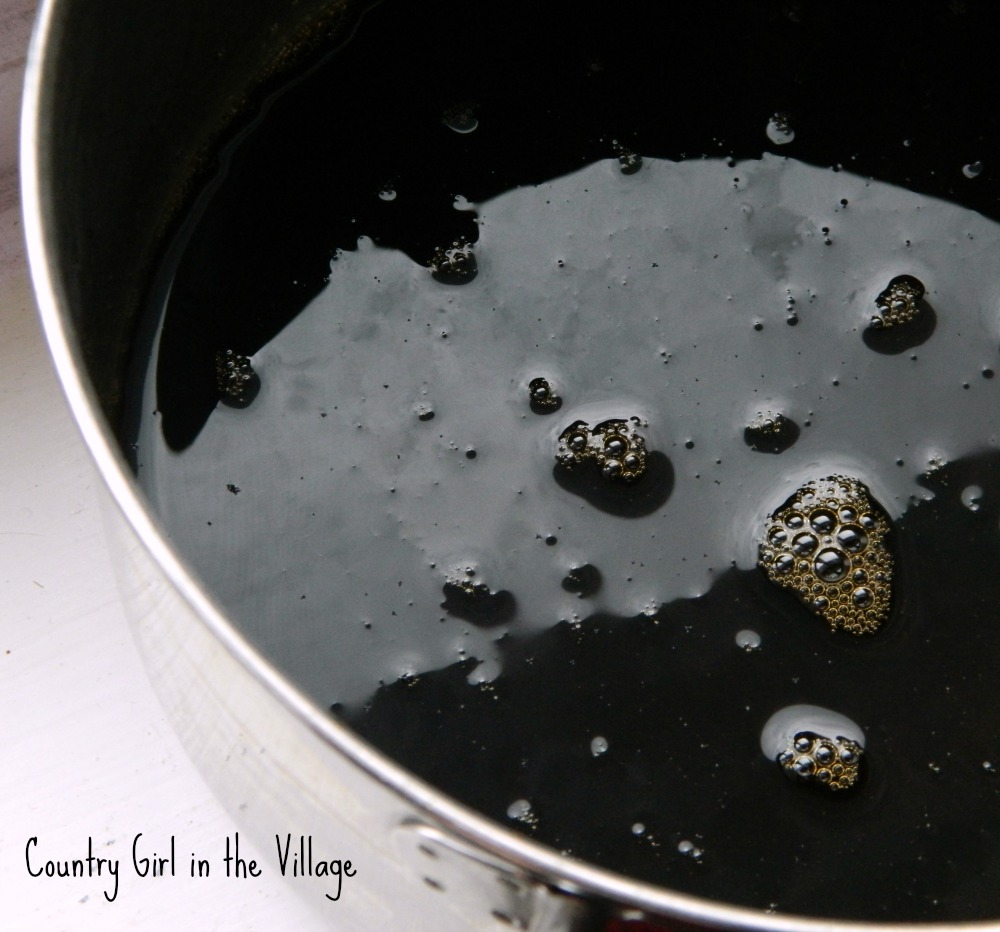
In this recipe I use light brown sugar, whole vanilla beans and fresh brewed, dark coffee. The color will come out beautifully dark that lightens to a pretty chocolate brown once you add the rum.
The adults in your life will swoon…
Homemade Kahlua Recipe
Ingredients
1 cup Light Brown Sugar
1 cup Strong Brewed Dark Roast Coffee
1 Vanilla Bean (Split in half)
1 pint Rum
Note
When choosing a rum, choose one that you enjoy drinking. The flavors will mellow as you add the coffee vanilla infused simple syrup, but the smoothness of the drink will depend on the quality of ingredients.
Also, this can be served right away, however, I prefer to make it up 2 weeks prior to giving as a gift so that the flavors have time to develop.
Directions
Step 1
In a sauce pot, combine the sugar and coffee. Slowly, bring to boil, stirring as the sugar dissolves. 10 minutes
Step 2
Add your vanilla bean, split in half length wise, to the coffee. Steep and a simmer for 30 minutes.
Step 3
Allow the coffee simple syrup to cool.
Step 4
Add in your rum and stir. Bottle with the vanilla bean.
Now that you have this awesome coffee liqueur with a hint of real vanilla what do you do? I suggest bottling it in a pretty glass bottle and including a drink recipe. One way that I like to serve this is simple. On the rocks with cream and a sprinkle of freshly grated nutmeg. The velvety, coffee and vanilla liqueur’s flavors showcase really well with the cream. It is an indulgent adult treat.

There are so many possibilities with homemade gifts. The #SundaySupper Team has been hard at work whisking, baking, pouring and taste testing so that we could bring you the best ever recipes to add to your own Gifts From Your Kitchen. How do you even decide where to begin? I don’t know, I pinned them all. Looks like it will be a busy season in my kitchen this holiday season.
Dry Hopped Pale Ale from Founders Brewery Review
 Michigan is a great state to live in. Sure, we have some Murder Capitals, but that is not the be all, end all of Michigan. There are cities, suburbs, rural areas. There are miles and miles of coast line, inland lakes, rivers, waterfalls, streams… Michigan has a lot to offer.
One of the great things emerging from Michigan is the beer scene. There are micro-brews, breweries, pubs, beer houses, popping up all over the state. One such brewery that is getting a lot of deserved attention is the Founders Brewery in Grand Rapids, MI.
I like a fine dry wine, a red preferably. Dry can be used to describe more than just wine. The beer that I choose today is Dry Hopped Pale Ale from Founders Brewery. It is smooth with a great dry finish. This is a pale ale and is murky, golden in color, with a short white head when poured. The aggressive use of hops in the brewing process leave this beer with great citrus notes, specifically grapefruit.Beer
I found the Dry Hopped Pale Ale to be refreshing. It compliments a nice summer day. Lucky us though, it is not a seasonal beer and it offered all year. I would pair this beer with seafood or something spicy. There is enough sweetness to combat the heat of a spicy dish. My mind is already turning… this would pair so well with Asian inspired cuisine. Spicy chicken skewers…spicy noodle bowls. Oh Yea! Where do I sign up?!
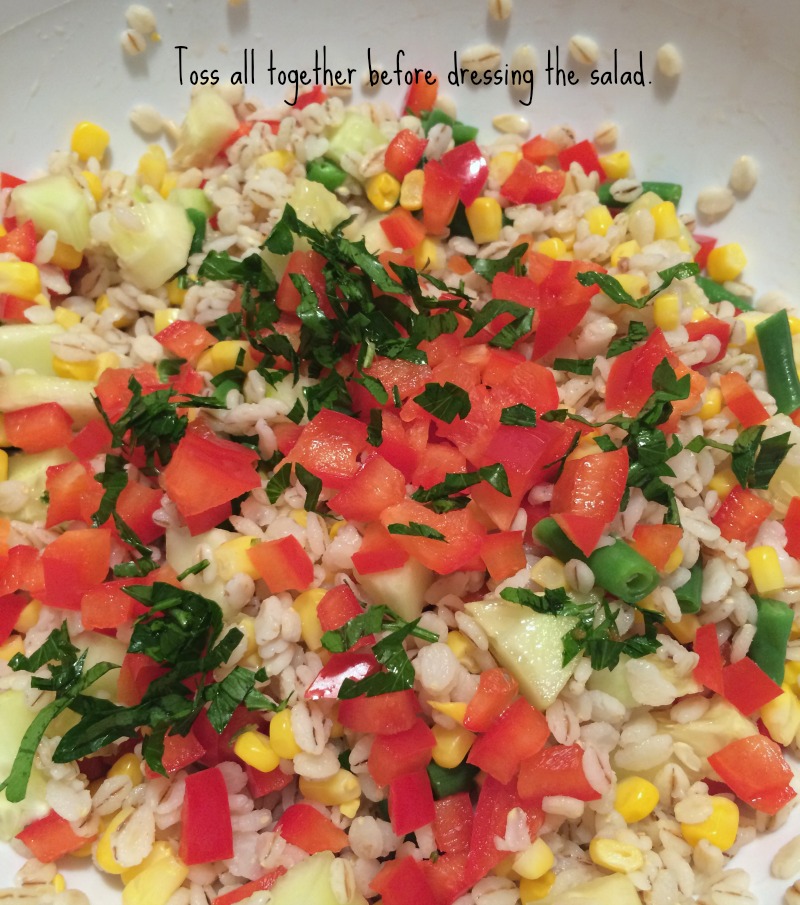
Barley Salad Recipe
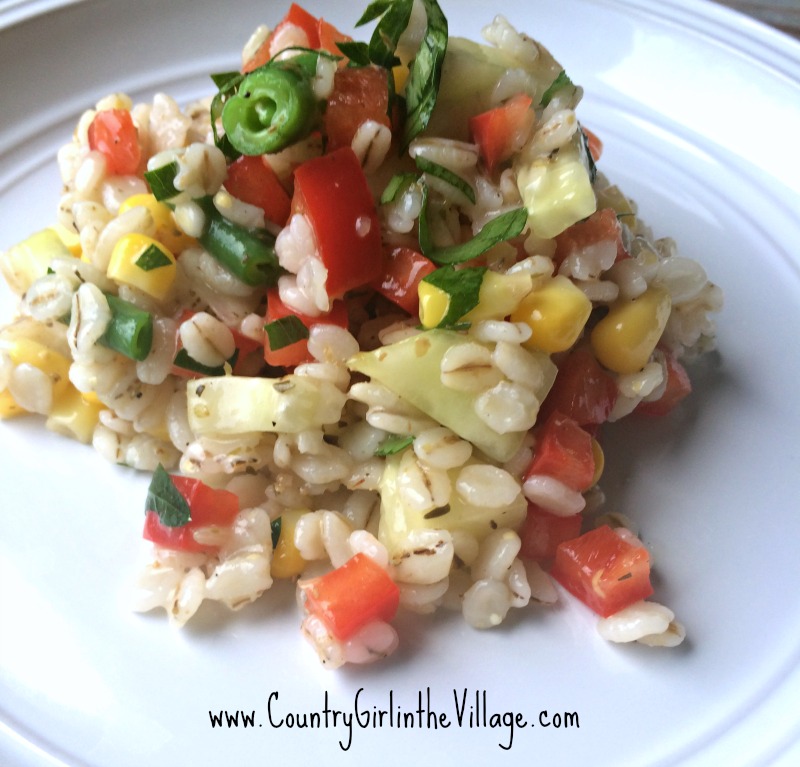
This year, I have been trying to stay away from highly processed foods. This has asked me to get creative with ingredients. Stepping out of my comfort zone of rice or even quinoa, and try new things. Grains, Carbs, they can get a bad reputation in my opinion, but I like my grains and so I need to be more adventurous when I use them. My new grain of choice… Barley. It is not just for the condensed beef soups that you may have grown up with. Barley is awesome.
Barley is a cereal grain. It has been cultivated for centuries from Asia to Medieval Europe. It can be made into flour for bread or used to make beer. Who doesn’t love bread and beer? This cereal grain is low on the Glycemic Index and high in fiber. This salad calls for pearled barley. That means the outer bran layer of the grain has been taken off. You can try to make it with the whole grain, but I have not and I can not vouch for texture.
Using what I had fresh on hand from my garden, I decided to make up a salad that would feature this awesome grain.
Barley Salad Recipe
Ingredients
1 cup Pearl Barley (Prepared as the package says)
1/2 cup Corn (from the cob if possible)
1 cup Green Beans (Chopped)
1 Red Bell Pepper (diced)
1 Cucumber (seeded and diced)
1/4 Scallions
1/4 Greek Salad Dressing
Directions
Step 1
Prepare the Pearl Barley as the package suggests. Drain well and cool.
Step 2
Blanch your Green Beans and Corn. Drain well
Step 3
To your cooled Barley, add in the diced veggies, parsley and scallions. Mix well
Step 4
To dress this salad, use a Greek Salad style vinaigrette. Served Chilled.
You can use store bough Greek Dressing for this salad, but if you want to stay away from processed foods try making the dressing yourself. It is simple to make and tastes great.
Greek Style Salad Dressing Recipe
Ingredients
1 cup Extra Virgin Olive Oil
3/4 cups Red Wine Vinegar
1 Garlic Clove Minced
1 tablespoon Dried Oregano
2 teaspoons Dijon Mustard
1/2 teaspoon Dried Dillweed
Salt and Pepper to taste (I use 1/4 tsp of salt and lots of black pepper.)
Note
Remember when making dressing, it is easier to add then to take away. Be sure to taste your dressing and add salt and pepper a little at a time.
Directions
Step 1
You can whisk everything together in a bowl or like I do, combine in a food processor
Step 2
If using a food processor, I first add in my dried herbs and spices. I then pulse a couple of times to release some of the flavors.
Step 3
After you have added in the herbs and spices, I add in the garlic, Dijon mustard, olive oil and red wine vinegar and mix well.
Step 4
The dressing is ready to use right away. You can adjust the salt and pepper to your taste. Also, I tend to like brightness of the vinegar so I am heavy handed with it, but it is all a matter of taste.
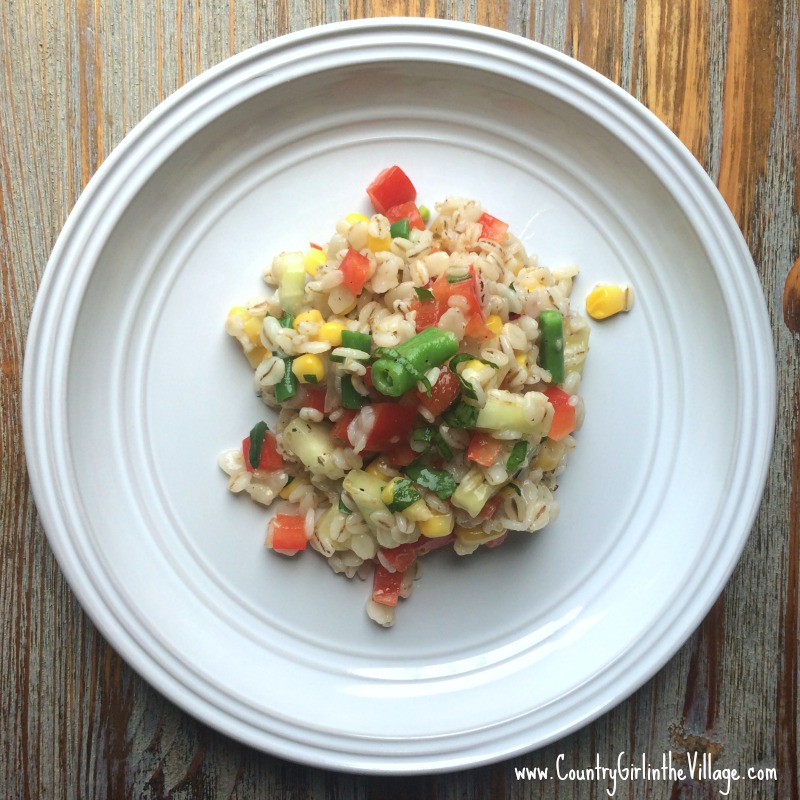
This salad was a great way to feature what is in season right now where you live. From your own garden or your local farm market, get creative. Change up the veggies as you see fit. I love the fresh parsley in this salad, but maybe you want to try mint. Go for it.
Grilled Shrimp Skewers with Sweet White Blend Marinade Recipe
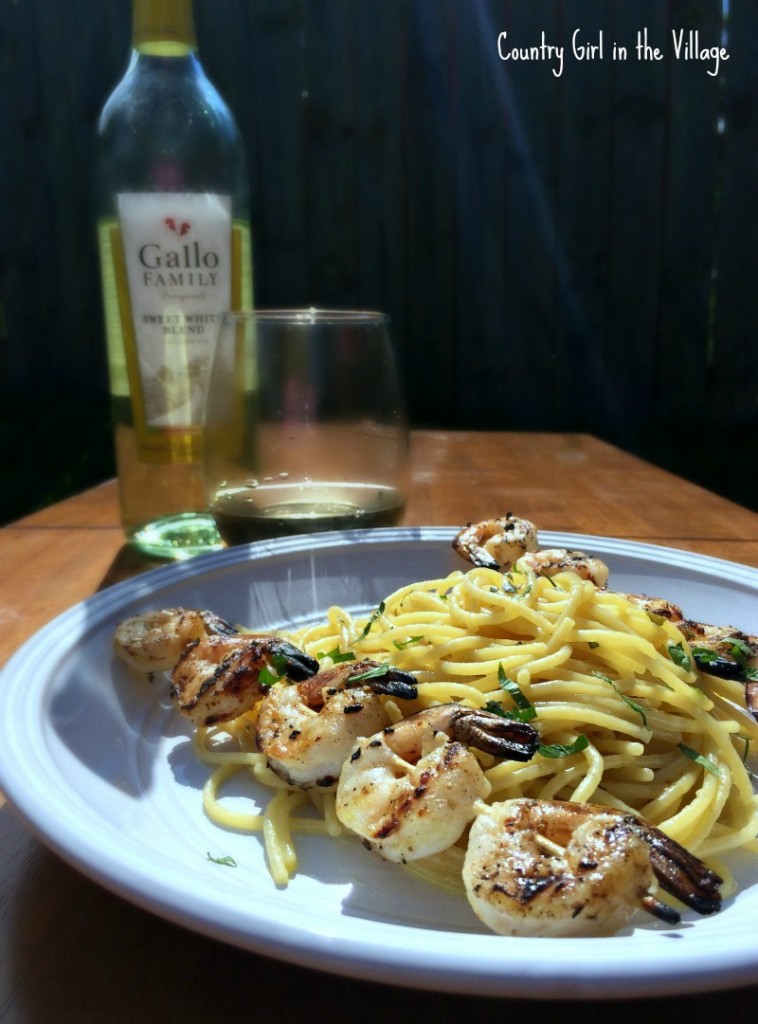
Outdoor dining is one of my favorite parts of summer! I love the laid back atmosphere, plus everything tastes better on a grill. Smokey flavors, friends, family, all paired with laughter and a glass of wine sounds like a perfect evening in my book.
Gallo Family Vineyards Sweet White Blend is the inspiration for this recipe. I love its simple sweetness and how it pairs with light, fresh, foods. The notes of peach and tropical fruit in this blend called to me and I knew I had to pair it with fresh Shrimp.
Grilling Shrimp can seem like a challenge, but they cook fast and are easy to work with. The key really is in using raw shrimp. I know, I know, crazy, but sometimes people use already cooked shrimp and they do not take on flavor as well. I find that a simple marinade adds great flavor. Skewers make grilling easier and are a fun way to serve your shrimp.
Grilled Marinated Shrimp Recipe
Ingredients
1/3 cup Gallo Family Sweet White Blend Wine
1/3 cup Extra Virgin Olive Oil
1 Lime (Juiced)
1/4 teaspoon Ground Ginger
1/4 teaspoon Sea Salt
1/4 teaspoon White Pepper (Fresh cracked if possible)
1 teaspoon Crushed Red Pepper Flakes (Adjust to your comfort level (optional))
1lb Shrimp (Raw)
Cilantro (Optional, but I do like to throw in a few torn leaves myself.)
Note
Putting the shrimp onto the skewer before marinating them makes handling the shrimp easier when it comes time for grilling.
Directions
Step 1
Into a bowl, whisk together your wine, oil, juice and spices.
Step 2
Put your shrimp on to the skewers and into a large plastic bag.
Step 3
Pour your marinade over the shrimp skewers. Let sit for about 15 minutes.
Step 4
Grill at a high temperature until shrimp turn pink, flipping each skewer once in the process.
The shrimp in this dish develop such bright flavors from the citrus and wine marinade. They are perfect over a salad or paired with rice. In my case, I paired the shrimp with a simple pasta dressed in Extra Virgin Olive Oil and sprinkled with fresh basil and parsley. It was wonderful!
Cooking with wine, it is important to use a wine that you enjoy the flavor of, because you are infusing this flavor into your dish. Another bonus to cooking with wine is that it makes pairing simple. Go ahead, serve a glass of the very wine you infused into your dish. It will be perfect. Serving these shrimp with a chilled glass of the Gallo Family Sweet White Blend is just a flawless combination. You will be sure to wow your friends and family with this pairing.
Grilled Salad with Skirt Steak Recipe
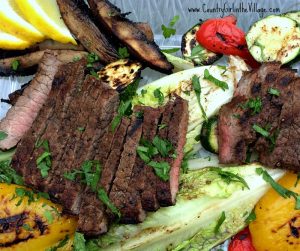 Once the heat of July really hits, you will find me grilling most of our meals. Grilling brings an endless array of great ways to makeover meals. Salad and Steak… total classic, we have all had it. Now, Grilled Salad, that is something new. Let me tell you, the colors and flavors that grilling your classic salad ingredients brings out is amazing! You have to give it a try.
This grilled salad is such a great way to use what veggies are in season. Head over to your garden and pick whats ripe or to your farmers market. You can add tomatoes if you have them, yellow squash, eggplants, really anything. Just throw it on the grill. Trust me on this one. Grilled Romaine Lettuce has an entirely different flavor. It is amazing.
Grilled Skirt Steak Recipe
Ingredients
1lb Skirt Steak
1 Red Bell Pepper (Cut in large pieces, This makes grilling easier. You can slice it smaller before serving.)
1 Yellow Bell Pepper (Cut in large pieces)
1 Zucchini (cut in 1/2 inch slices)
2 heads Romaine Lettuce (cut in half, length wise.)
3 Portabella Mushrooms
1/2 cup Extra Virgin Olive Oil (For your Marinade)
1 tablespoon Balsamic Vinegar
1/8 teaspoon Ground Cumin
1 Lemon (Cut into Wedges)
Green Onions (sliced thin)
Handful of Parsley and/or Cilantro
Salt and Pepper to taste
1 tablespoon Extra Virgin Olive Oil (This is for drizzling on your veggies)
Directions
Step 1
Prepare your marinade for the steak. Mix Extra Virgin Olive Oil, Balsamic Vinegar, Cumin. Whisk together and pour over steak to marinade. This will marinade for about 15 to 20 minutes.
Step 2
Start your grill. You will want a temperature of around 400F
Step 3
Wash and Chop your veggies. Drizzle Extra Virgin Olive Oil and sprinkle a pinch of salt and pepper.
Step 4
To your grill add your veggies and steak. This is hot and will cook fast. Give your steak a flip, according to the doneness that you like steak.
Step 5
Serve this with a lemon wedge, a sprinkle of green onions and fresh herbs such as parsley and cilantro.
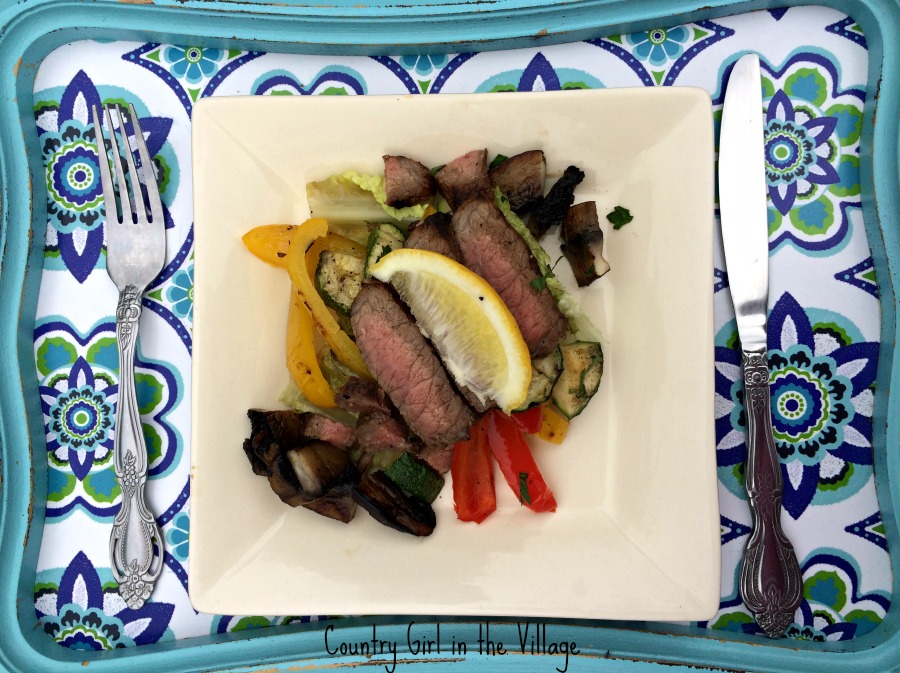
This meal is also great for a meatless option…just leave out the steak. The Portabella Mushrooms add a meaty quality that mimic the steak well. You will be amazed at what grilling can do to your veggies. Who needs a calorie laden dressing?! Not with this salad. The squeeze of lemon mixing with all the natural flavors brought out by grilling makes this a bright, flavorful salad.
Lemon Thyme Ice Pops Recipe
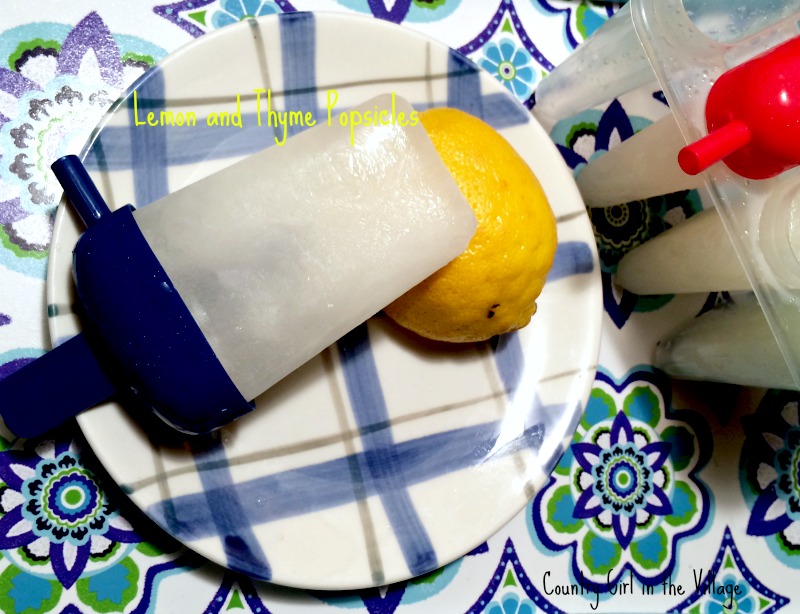
It is a Holiday weekend. Lots of fun to be had. The heat of July and August are sure to be on the way… right? We actually spent the 4th bundled into sweatshirts to watch the fireworks. It was chilly down by the lake, but it was beautiful. There is just something magical in a small town festival. Parades, picnics, swimming in a lake and of course fireworks.Fireworks
One of the major attractions at these kind of small town celebrations are the ice cream trucks or snowcone trucks. They are a hit with my kids. One still has blue stained lips this morning. These frozen favorites along with my herb garden were the inspiration for today’s recipe. Lemon and Thyme, they are such a classic combination. In fact, if you wanted to skip the freezing you could have yourself a delightful chilled beverage. Either way works well, but for the kid in all of us let’s stick to the frozen treat.
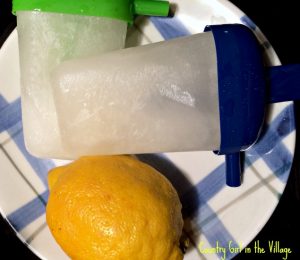
Lemon Thyme Ice Pops Recipe
Ingredients
1 cup Sugar
2/3 cups Water
2 Lemons (Juice from 2 and zest from 1)
5 sprigs Thyme
Note
To help release your Popsicles from their molds, run them under warm water for just a minute. Then you should be able to pull them out with out a problem. If they stick, give them another run under the warm water.
Directions
Step 1
Into a non reactive pot, combine water and sugar.
Step 2
Heat on a medium heat and stir until the sugar has dissolved.
Step 3
Add your freshly squeezed lemon juice, the zest of 1 lemon and your sprigs of time.
Step 4
Turn the temp down to low and allow the flavors to steep for 10 minutes. There is no need to boil the mixture.
Step 5
Remove the Thyme sprigs and let cool a bit before pouring into your molds. Freeze.
Be sure to check out all these great Summer Chilling Recipes from the #SundaySupper Team. They are sure to help you beat the heat as summer really gets under way. A big Thank You to our host this week, Alaiyo over at the Pescetarian Journal for putting together such a fun event!
Healthy Beef Stroganoff Recipe
Bad day? Rain on your parade? No party invite in the mail? Sometimes, we just need a big bowl of ice cream or mashed potatoes to comfort us, make us feel better. Certain dishes remind us of home when we are far away or they can soothe away the common cold. Food has the power to remind us of better times, perhaps bring a smile to your face, and warm your soul while it warms your belly.
Emotional eating may not always be best for a healthier lifestyle though. This week, #SundaySupper is teaming with American Family Insurance and their campaign to #ChooseDreams. We are bringing you healthy versions of classic comfort foods, family favorites with a healthy twist.
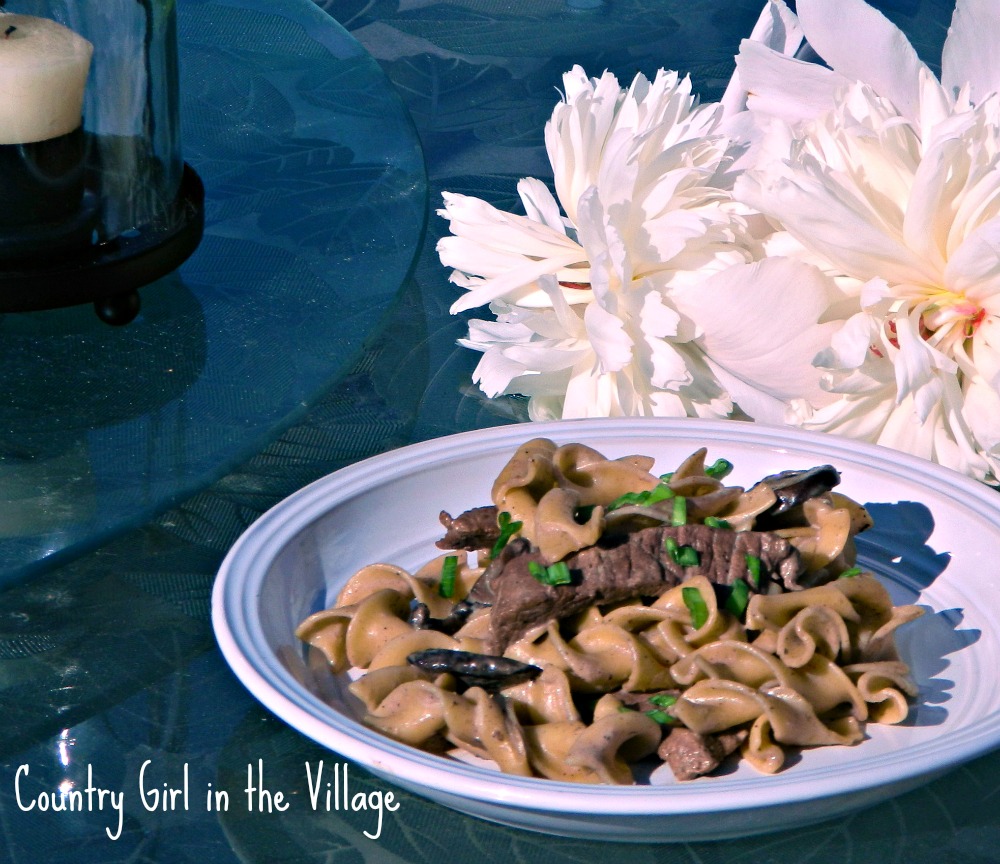
The first dish that came to mind, for me, was Beef Stroganoff. I love the noodles, the butter, the creamy rich gravy and the tender but definitely not lean cuts of beef. On a cold Michigan day, I love nothing more than to turn to a bowl of this wonderful dish. While I love nothing more than to turn to the rich goodness of this classic dish, it is not always best to give in to that guilty pleasure.
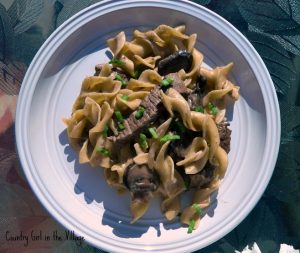 Today’s healthy Beef Stroganoff is minus the butter and cream. I still use the egg noodles that are such a large part of this classic dish, but I have slimmed it down with lean beef and by substituting Greek yogurt for cream. Fresh herbs, red wine, broth and simple ingredients give this one time not so good for you comfort a less guilty twist. Greek yogurt has a tang like the classic sour cream and melts into the broth giving it a creamy texture that your family will recognize from the classic dish, but with no butter, cream, fatty cuts of meat or flour. I hope you enjoy.
Healthy Beef Stroganoff Recipe
Ingredients
1.5 cups Beef Broth (Low Sodium)
2/3 cups Greek Yogurt (Plain, non-fat for less fat and calories)
2 tablespoons Red Wine (I used Merlot)
1 Small Onion, Vadalia (sliced thinly)
1 clove Garlic (crushed)
1 cup Mushrooms (I used cremini)
1lb Round Steak (sliced thin, any fat trimmed away)
1 teaspoon Extra Virgin Olive Oil
1 dash Worcestershire Sauce
1 teaspoon Salt (to start, add more as needed to taste)
1 teaspoon Fresh Cracked Black Pepper (to start, add more as needed to taste)
1lb Egg Noodles
Scallions (for finishing)
Directions
Step 1
Into a large skillet, add the Extra Virgin Olive Oil and saute onion, garlic and mushrooms.
Step 2
As the onions soften, add in the beef, salt, pepper, Worcestershire Sauce, broth and wine. Bring to a simmer. Stir occasionally
Step 3
As the beef cooks through, reduce the broth down for approximately 20 minutes. In a separate pot, boil your egg noodles.
Step 4
Once your sauce has reduced, remove from heat and stir in your Greek Yogurt. Drain your noodles when al dente and add to your sauce to finish.
Step 5
If sauce gets too thick, add additional beef broth. Serve warm with a sprinkling of scallions or chives on top.

AMFAM American Family Insurance is asking us to #ChooseDreams. Have I said lately just how much I love this wonderful concept?!
Today’s theme is not just about choosing dreams but also turning comfort foods healthy. It acknowledges our need for comfort and memories, but adds such a great healthy twist that feeds our bodies as well as our souls.
I love this concept! Food can create such strong memories and emotions.
Why not turn those into healthier options for your table?
Hopefully your family enjoys this healthy and savory beef stroganoff recipe as much as mine did!
Pesto Pasta Salad Recipe
Today, today is a beautiful day! Even rainy days can be beautiful. It’s a mindset. School is out for my boys and myself. It is the magical time of summer vacation. I love this time of year to sit back and watch things grow. Watch my boys grow, my garden grow and also watch all the excitement of summer… well, grow. Each day brings new and exciting possibilities and with family and friends about, how can you not be excited for all that Summer has to offer?!
One of the things that I am most excited about is my garden. It has already grown so much. One of the few veggies that we outdoor gardeners, in my neck of the woods, can harvest at the moment are peas. There is nothing like the sweetness of a fresh shelled pea. To be honest, we may or may not just eat them straight from the garden most days…
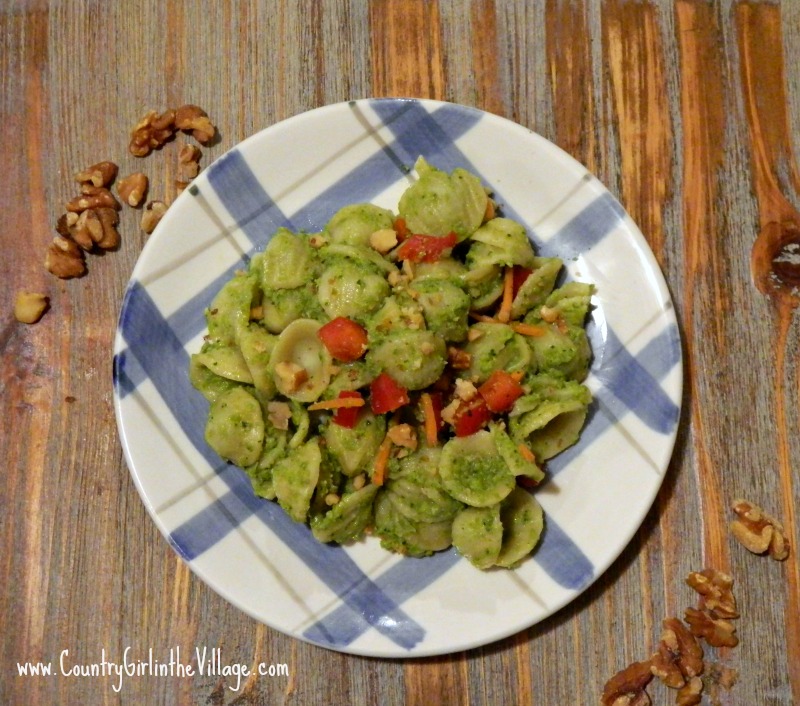
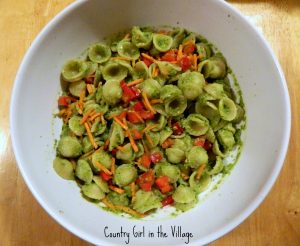
This Pesto Pasta Salad is inspired by what my garden is producing. Letting Mother Nature dictate what we eat is a growing passion of mine. Seasonal eating.
Green Pea Pesto Pasta Salad
Ingredients
1.5 cups Green Peas (Fresh or frozen and unthawed)
5 Basil Leaves (Fresh)
1 clove Garlic
1/2-1 cup Extra Virgin Olive Oil
1/4 cup Parmesan Cheese (Grated)
1/2 Juice of a Lemon
Salt and Pepper (to taste)
1 Red Bell Pepper (diced)
1 Carrot (Julienne or finely diced.)
1/2 cup Walnuts (chopped)
1lb Pasta (I use Orecchiette)
Directions
Step 1
If using fresh peas, blanch them first in boiling water… Into a Food Processor, combine the peas, basil, grated cheese, juice of half a lemon and half of your chopped walnuts.
Step 2
Drizzle in Extra Virgin Olive Oil until the Pesto reaches your desired consistency. I use about 1/2 a cup of oil.
Step 3
Add salt and pepper to taste then set pesto aside to chill.
Step 4
Boil your pasta, drain when al dente
Step 5
In a bowl, combine the pasta, pesto and veggies. Next, sprinkle in the remaining walnuts. Serve chilled.
BBQ Chicken Nachos Recipe
Today is a day that we celebrate the men in our lives, fathers, grandpas, husbands… What better way to show our appreciation than food?! It has been said that the way to a man’s heart is through his stomach. Knowing the men and boys in my life, there is some merit in that statement.

Today, I am sharing a BBQ Chicken Nacho. This can be as complex or as simple of a recipe as you want to make it. I started with a store bought rotisserie chicken. Gasp! I know, but I did. However, I did make the bbq sauce and that simmering away on my stove with shredded chicken absorbing all the wonderful flavors was a nice trade off in my book.
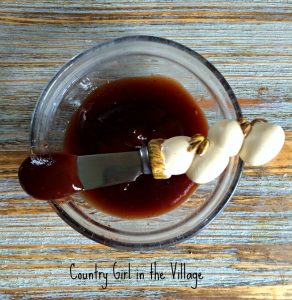
 Homemade BBQ Sauce
Ingredients
1.5 cups Ketchup
1/2 cup Orange Juice (No Pulp)
1/4 cup Molasses
1 tablespoon Worcestershire Sauce
1 cup Dark Brown Sugar
2 teaspoons Mustard, powdered (the seasoning and not the hotdog condiment)
2 teaspoons Smoked Paprika
1/2 teaspoon Garlic Powder
1/4 teaspoon Onion Powder
1/4 teaspoon Cayenne Pepper
1 teaspoon Salt
1 teaspoon Freshly Cracked Black Pepper (I want the black specks in the sauce, plus it tastes awesome)
Directions
Step 1
Into a non-reactive sauce pot add in all of your ingredients.
Step 2
While simmering, stir until all combined and the sugar has dissolved into the mixture.
Step 3
Bring the sauce up to a slow boil. Turn down heat and simmer until the sauce has reached your desired consistency. Stir often. If sauce thickens up too much on you, you can thin with water.
Step 4
At this point, you can still make adjustments for heat by adding more Cayenne Pepper as well as salt and pepper to make it how you like.
To assemble your nacho, in a pan, combine your shredded chicken and bbq sauce (maybe homemade maybe not). Let warm through and simmer to absorb the most flavor, 10-15 minutes. While this is becoming awesome, you can chop up your veggies, make a pico or salsa. Once the chicken is full of flavor, spread chips into a cast iron skillet or backing dish. Next, layer the bbq chicken and top with freshly shredded Monterey Jack Cheese. This goes into a 350 F degree oven until the the cheese is melted and the chips are toasty and warm.
 BBQ Chicken Nacho
To serve, top each plate with fresh pico de gallo, scallions and a dollop or sour cream.
This Nacho was such a hit that the Husband went back for seconds and thirds. The skillet and freshly shredded cheese helps to prevent a soggy nacho. As an appetizer, the skillet makes for a great serving bowl as well.
Skillet Nacho
There is something for everyone is this jam packed, full of goodness, #SundaySupper. The Team along with our host, Susan from The Girl in the Little Red Kitchen, has you covered! We are excited to share some of our favorite “Man Food Recipes.” We hope you enjoy these recipes as much as we have – there has been a lot of laughs behind the scene!
Cheers!
Asparagus Penne with Bacon Cream Sauce Recipe
The birds are chirping and we finally have green… green grass, green leaves and my favorite part green in my garden. This past winter was incredibly long. I was beginning to believe Spring was never going to come knocking on our door.
To help with Spring fever in our Michigan home, we go through seed catalogs. The bright pictures and colorful names of plants are just what is needed in the final grips of winter. My children love to pick out different seeds to try. This year’s bounty will include Cherokee Purple, Brandywine and Black Krim tomatoes. How can those names not inspire the would be gardener?!
When the packets arrive in the mail, we set to work. Little pots begin to cover our window sills. We do not have a greenhouse and in our zone, seeds need to start well before the ground thaws. To do this, we start the seeds in pots and then cover the pots with clear plastic baggies from the store. Yes, the sandwich style variety. They work like a charm. Voila, indoor green house. I poke just a little hole or two at the top for air flow.
The baggies are wonderful at creating a warm humid environment for seeds to germinate and sprout. My boys love to check to see when the first bits of green will pop up. Sometimes, to keep them engaged, we take bets on which will sprout first. Winner gets to pick dessert one night. This year, our Basil was the first to sprout… and one boy earned us all ice cream sundaes. Win Win situation in my books.
Homemade Greenhouse
Seeds represent hope, dreams of the future. They are the beginning steps to new lifestyles, healthy living, even just a promise to stop and smell the roses now and then, so to speak. Seeds are tiny little packages that help teach responsibility, patience and persistence. You have to wait weeks, months even for those tiny little seeds to bear fruit. One must take care of them, water, sun, weeding… all those chores add up and are an investment in what is to come.
Even in the heat of summer, being persistent pays off and you are rewarded with healthy foods for your family. These life lessons are so important. Having dreams is wonderful. Being inspired is great. Taking the next step, and pursuing those dreams is even greater. Go For It! Just go for it. Don’t be afraid to try, jump into life and if you fail at something, learn from it. Failures lead to great learning.
Herbs
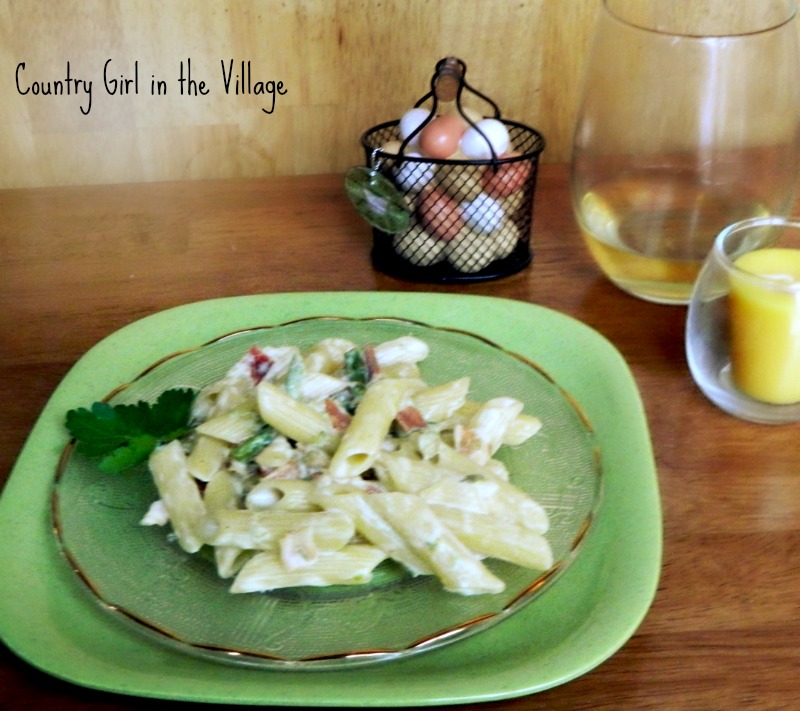
Through the winter, my family started seeds and just recently some of those have given us fruit. Today, I am sharing a recipe for a simple pasta dish. It uses asparagus from my garden as well as herbs that we grow ourselves.
Asparagus Penne with Bacon Cream Sauce Recipe
Ingredients
1lb Penne Pasta
1 bunch Asparagus (woody ends chopped off and cut into 1 inch pieces)
5 pieces Thick Cut Bacon
1/2 cup Half and Half
1/4 cup Scallions (finely chopped)
4 Tarragon Leaves (finely chopped)
1 pinch Salt
1 pinch Fresh Cracked Black Pepper
1 teaspoon butter
Parsley (garnish)
Parmesan Cheese (garnish)
 Directions
Step 1
I use a Cast Iron Skillet for this dish. First, fry your bacon and reserve the drippings.
Step 2
Crumble the bacon back into the drippings (roughly 2 tbsp) and add in your cut asparagus. I cut the spears into 1 inch pieces. Saute them in the drippings.
Step 3
Once the asparagus has began to soften, add in the half and half and the tarragon. Mix Well.
Step 4
Simmer until your sauce thickens. Boil your pasta.
Step 5
Add salt, pepper, scallions and butter to sauce. Stir
Step 6
Add your cooked pasta to the skillet and allow to finish in the sauce for a minute or two.
Step 7
Serve warm with a sprinkle of Parsley and perhaps some fresh grated Parmesan cheese.
Stuffed Baby Sweet Peppers Recipe
It is Labor Day weekend. The official end to summer in Michigan. Beaches close and kids head back to school. Leaves on the trees are starting to turn and my tomatoes will never ripen. Seriously, what happened to the summer? I am sending my oldest boy off to his Freshman year of high school on Tuesday. This blows my mind. Wasn’t I just in high school my self? Wasn’t he just learning to walk on his own?

This recipe is one that I like to make as an appetizer or snack. Even better, the party leftovers pack perfectly into a lunch box. When #SundaySupper decided to do a Labor Day Party, I knew I had to share it. Eating these stuffed baby peppers is like a handheld salad of goodness.
Stuffed Baby Sweet Peppers Recipe
Ingredients
Baby Sweet Peppers (Top cut off and seeded)
Whipped Cream Cheese
Cucumber (julienned)
Carrots (julienned)
Chives
Green Onion (just the green scallion part is needed)
Fresh Cracked Pepper
Salt (to taste…I do not add any additional salt, but that is a preference choice)
Directions
Step 1
Chop your veggies and prepare to stuff your peppers. Mix the cream cheese, chives, scallions and fresh cracked black pepper.
Step 2
Using the whipped cream cheese, makes the stuffing of the peppers a bit easier. I first pipe in the cream cheese,
Step 3
Then add in the julienned veggies.
Step 4
They are ready to serve as soon as you have them stuffed or chill until your event.
The crunch of the peppers and carrots coupled with the refreshing, sweet, cucumbers and the herbs mixed in the cream cheese is just magic in each bite. The colors are eye candy on your table. You can add more veggies if you like. I have thought about adding spinach ribbons to these. Wouldn’t that be a great way to add spinach in to some people (Husband’s) diet?! Next time.


 Homemade BBQ Sauce


